

How I Create Stained Glass
Every piece that leaves my hands goes through a whole series of steps. No two pieces are the same, and none of them are made quickly.
This is the journey from the first idea to a finished stained glass piece.

1.
Idea, Inspiration & Client Consultation
Before I start drawing or cutting anything, I think about what the piece should express. I often find inspiration in nature, light, or the client’s wishes.
When it is a custom commission, I ask the client about their idea. I show them different color options and shape variations, and together we fine-tune the direction.
Only then do I begin drawing.
2.
Design
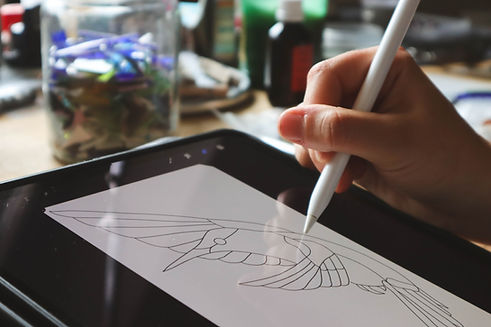
I draw a digital template.
Every shape, every line - everything has its purpose.
I always discuss the design with the client to make sure the final piece matches their vision as closely as possible.

3.
Glass Selection
Every sheet of glass, even of the same type, looks different. A single sheet can hold different colors, reflections, textures, and subtle streaks.
I carefully choose each part of the sheet so that every piece of glass fits perfectly into the final design.
Glass is also difficult to capture accurately in a photograph; it usually looks different from how it does in reality.
4.
Cutting Out the Template
I transfer the drawing into Cricut® software, which cuts the design template out of self-adhesive vinyl. I then place the individual template pieces onto the glass and use them as a guide for cutting and grinding.
However, I do not use Cricut® for every template. Sometimes I work in the traditional way, with pencil and paper.
I cut out the template by hand and trace the pieces onto the glass with a permanent marker. This method is not as precise, but it works well for simpler pieces that are always made in the same shape.


5.
Cutting, Breaking & Numbering the Glass
I cut the glass along the template using a glass cutter. No machine - just my hand, experience, and feeling.
I then break each cut piece by hand. Some shapes are delicate, fragile, and require a lot of patience.
And to avoid getting lost in dozens of glass pieces, I always mark each one with a number - without numbers, assembling the piece would be complete chaos.
6.
Grinding
The broken edges are sharp and irregular. So I grind each piece on a grinder with a diamond grinder bit until it fits precisely with the others.
This makes the edges of the pieces smooth and ready for the next step - the copper foil.


7.
Copper Foil
I wrap each individual piece of glass with copper foil.
Solder does not adhere directly to glass, but it does adhere to copper foil. This is what makes it possible to join all the pieces together.
The foil has to be firmly attached and precise. It creates the foundation for beautiful solder lines.
8.
Assembling
the Pieces
I put all the pieces together according to the design and check that everything fits exactly as it should.


9.
Soldering
Before soldering, I apply flux to the joints. This prepares the copper so the solder can adhere to it properly.
Then I use a soldering iron and tin to connect all the copper edges together.
This creates a solid, strong, shiny structure.
10.
Cleaning, Oxidation Protection & Patina
After soldering, I thoroughly clean and polish the piece. Then I apply a special anti-oxidation spray to help prevent the tin lines from darkening over time, so they stay beautifully shiny.
Alternatively, the tin can be coated with patina, which changes the silver joints to black or copper.
After applying the spray or patina, I polish the piece again to give it its final shine and clean finish.


11.
Completion
When it comes to a candle holder, lamp, plant stake, or hanging ornament, this is when I add legs, hanging hooks, rods, or chains.
12.
Finished Piece
Only now is the piece truly finished.
Before I pack it, I inspect it one last time, check every detail, and photograph it.


13.
Packaging & Sending
I pack each stained glass piece carefully so it can travel safely to you :)
Foam, rigid box, corner protection.
Personal handover, delivery company or post office - always with care.